The AWMS-245 Plus Thermal Transfer printer has the capability to print on a variety of labels. The most popular type of label to print is the AWMS Heat Shrink Wire Markers. These flattened, seamless heat shrinkable tubing pieces are attached to fanfold paper with a reusable, adhesive tape backing to make printing a breeze! The unique format provides a handy work-in-progress list and makes application a simple task for the installer.
Make sure you have the right size tubing for the wire you are working with by referencing our size chart here.
Once you are ready to start printing on your AWMS Heat Shrink Wire Markers, open your box of wire markers and place the box behind your AWMS-245 Plus printer so the red arrows on the side of the paper point toward the printer. Feed the paper through the slot in the back of the printer.
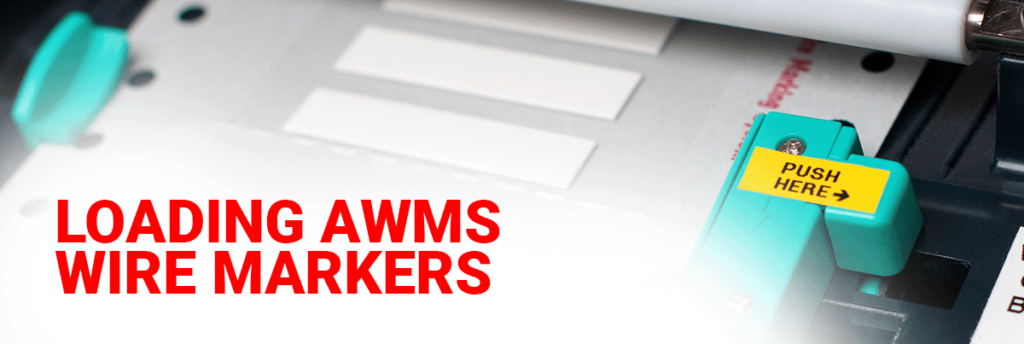
Continue to feed the paper under the white roller and between the teal guides. Using both hands, press the guides together until they fit snuggly against the paper, but without buckling the paper. You don’t want the guides too tight or too loose. Keep feeding the paper through until marker is past the teal guides. When loading a partially used box of markers, the paper needs to be pulled forward just past the gray rubber roller.
Make sure the black round eye on the sensor can be seen through the pin-feed holes on the right side of the paper. The black rectangular eye needs to read the black marks on the backside of the paper.
To close the printer, slightly lift up on the printer lid while pulling the printer lock arm toward the front of the printer.
Press down on the printer until you hear a click.
Turn on the printer by pressing the rocker switch on the back of the printer.
You should see the ribbon take up spool tension up to take slack out of the ribbon and the green light turn on. Now the printer is ready to print labels!